Lab · Tool
Tug
An interaction workbench for the gap between a Figma file and the code: bring your own button or card, compose how it should behave under the pointer, tune it by feel, and leave with something exact.
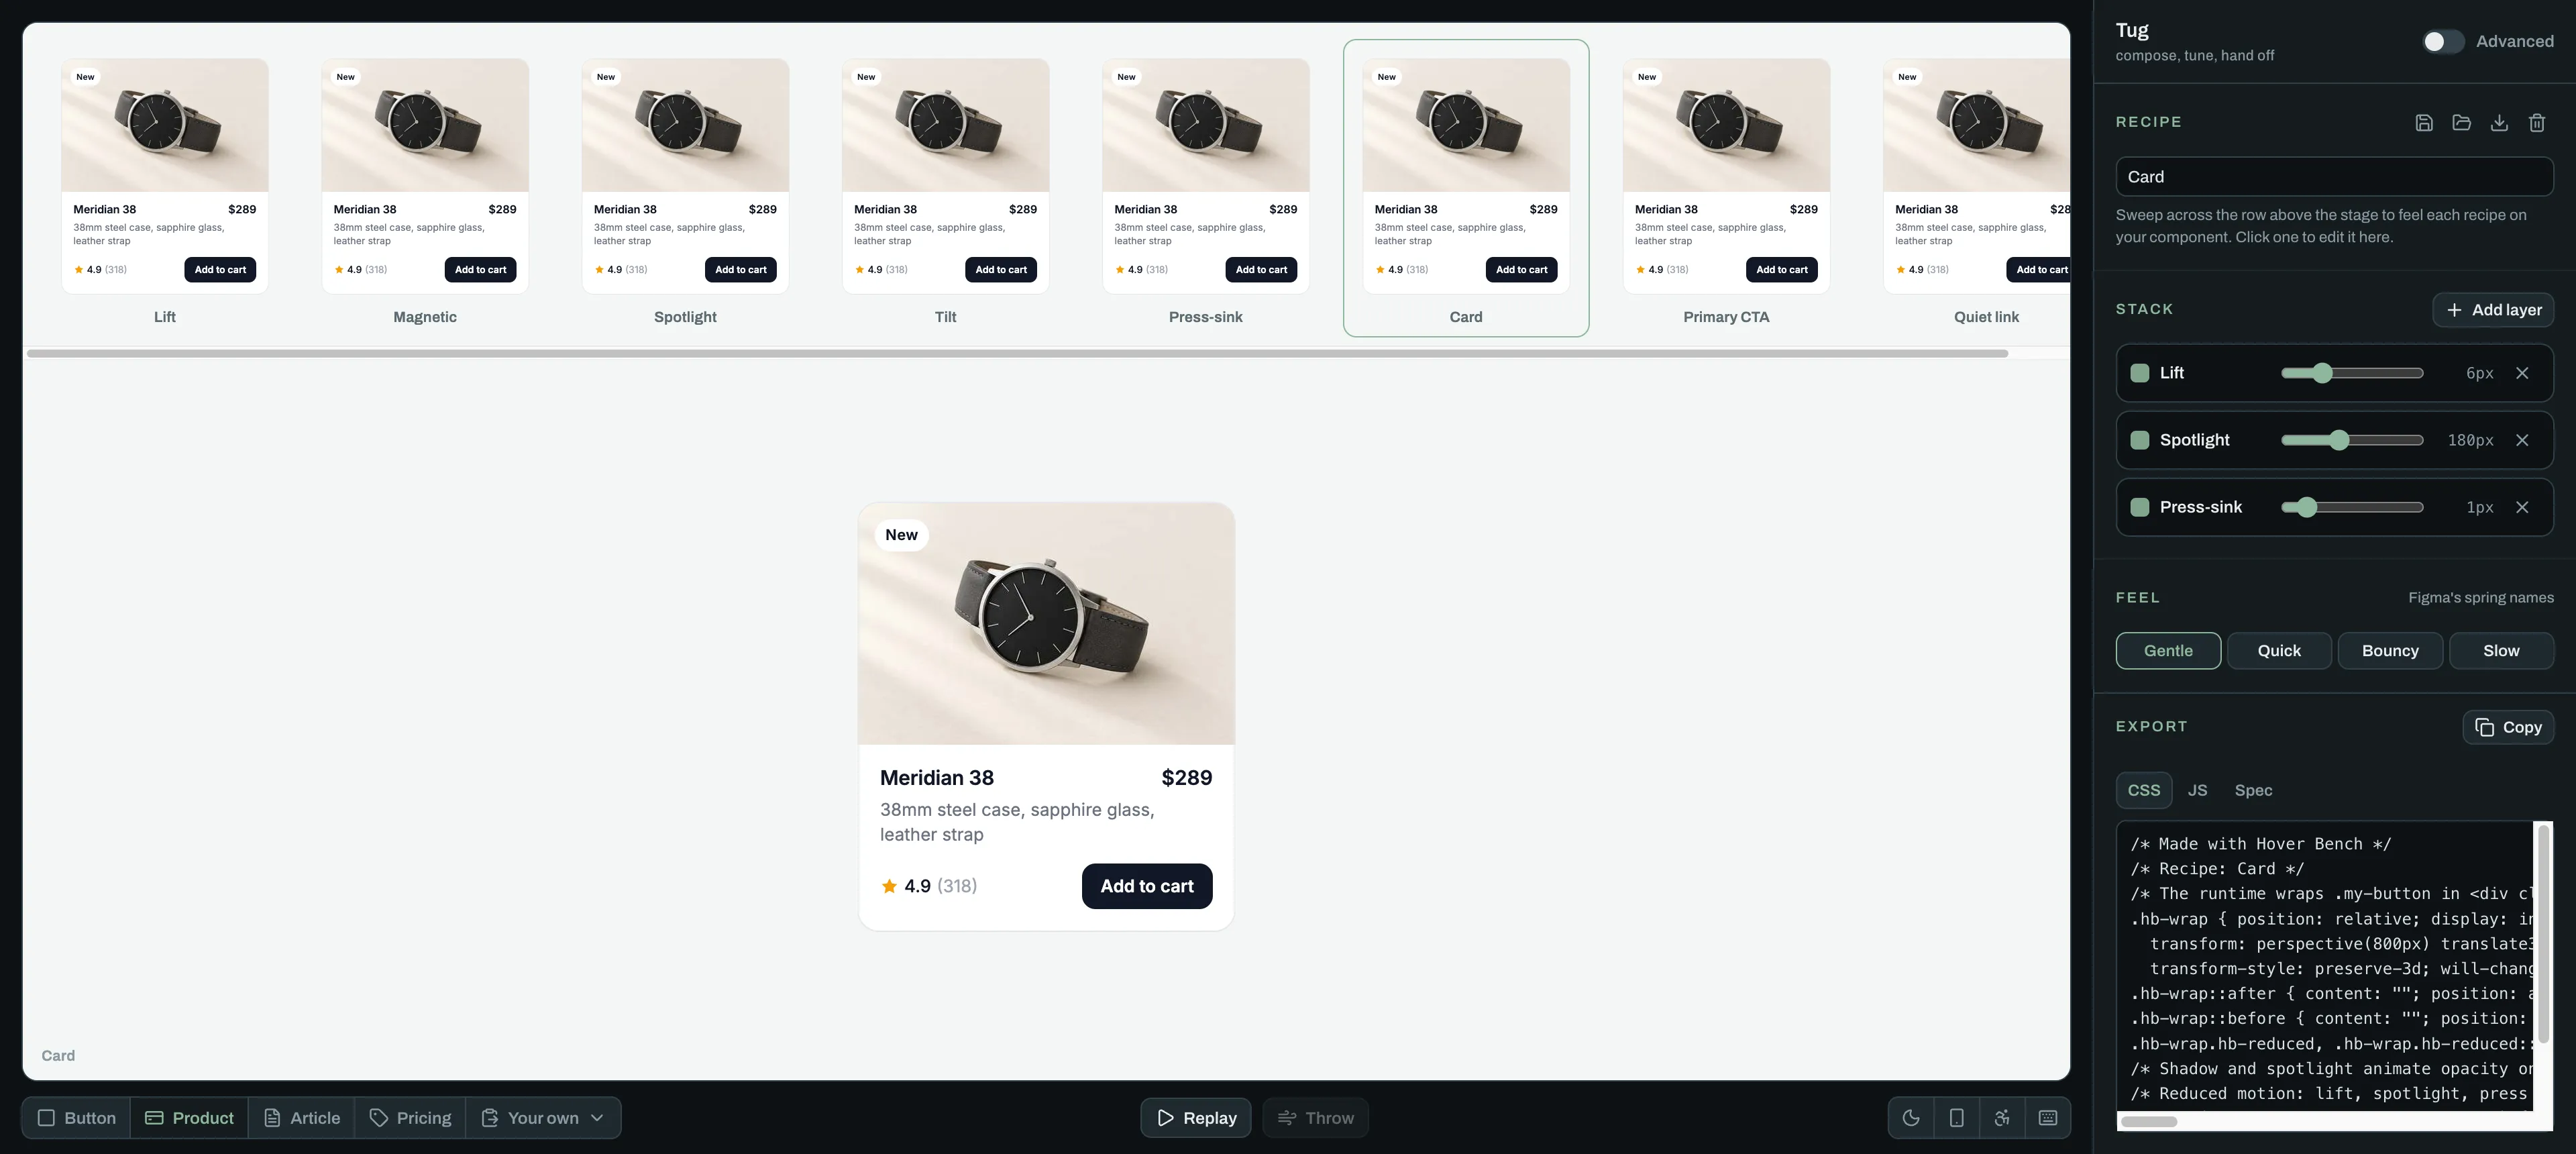 Click here to open the tool full screen
 Tug is a desktop tool. Open this page on a larger screen to use it here.
The workbench wants the whole window. Open it full screen, sweep across the recipe row, then click one and pull the sliders.
Open full screenWhat it's for
A designer decides how a button should feel, and then has no way to hand that over. Figma prototypes stop short of the pointer, and the code on the other side starts from a sentence. Four things go wrong in that gap.
- Figma can't follow the pointer. Prototypes have hover and springs, but nothing that tracks the cursor, so magnetic, tilt, and spotlight effects can't be shown at all.
- Springs don't travel. Figma's spring values never reach the code, and a developer's easing never comes back to the design.
- The handoff is a sentence. "Make it feel a little bouncy" turns into a guess, then a round of feedback, then another guess.
- Galleries show their button. Effect libraries demo on a sample component, so you can't judge the feel on the thing you actually designed.
Tug sits in the gap. You bring the real component, build up how it should behave, feel it, and hand over the code and the spec together.
How to use it
-
Bring your component
Start with a real-looking button, product card, article card, or pricing card, or bring yours: paste HTML and CSS, paste the CSS that Figma's Dev Mode copies, or drop an image of the frame.
-
Sweep the row
Every recipe runs on your component across the top of the stage. Move across them and feel each one before you commit.
-
Compose the stack
Click a recipe, then add or remove layers: lift, magnetic, spotlight, tilt, press-sink. Each layer has its own amounts and a reduced-motion policy.
-
Tune the spring
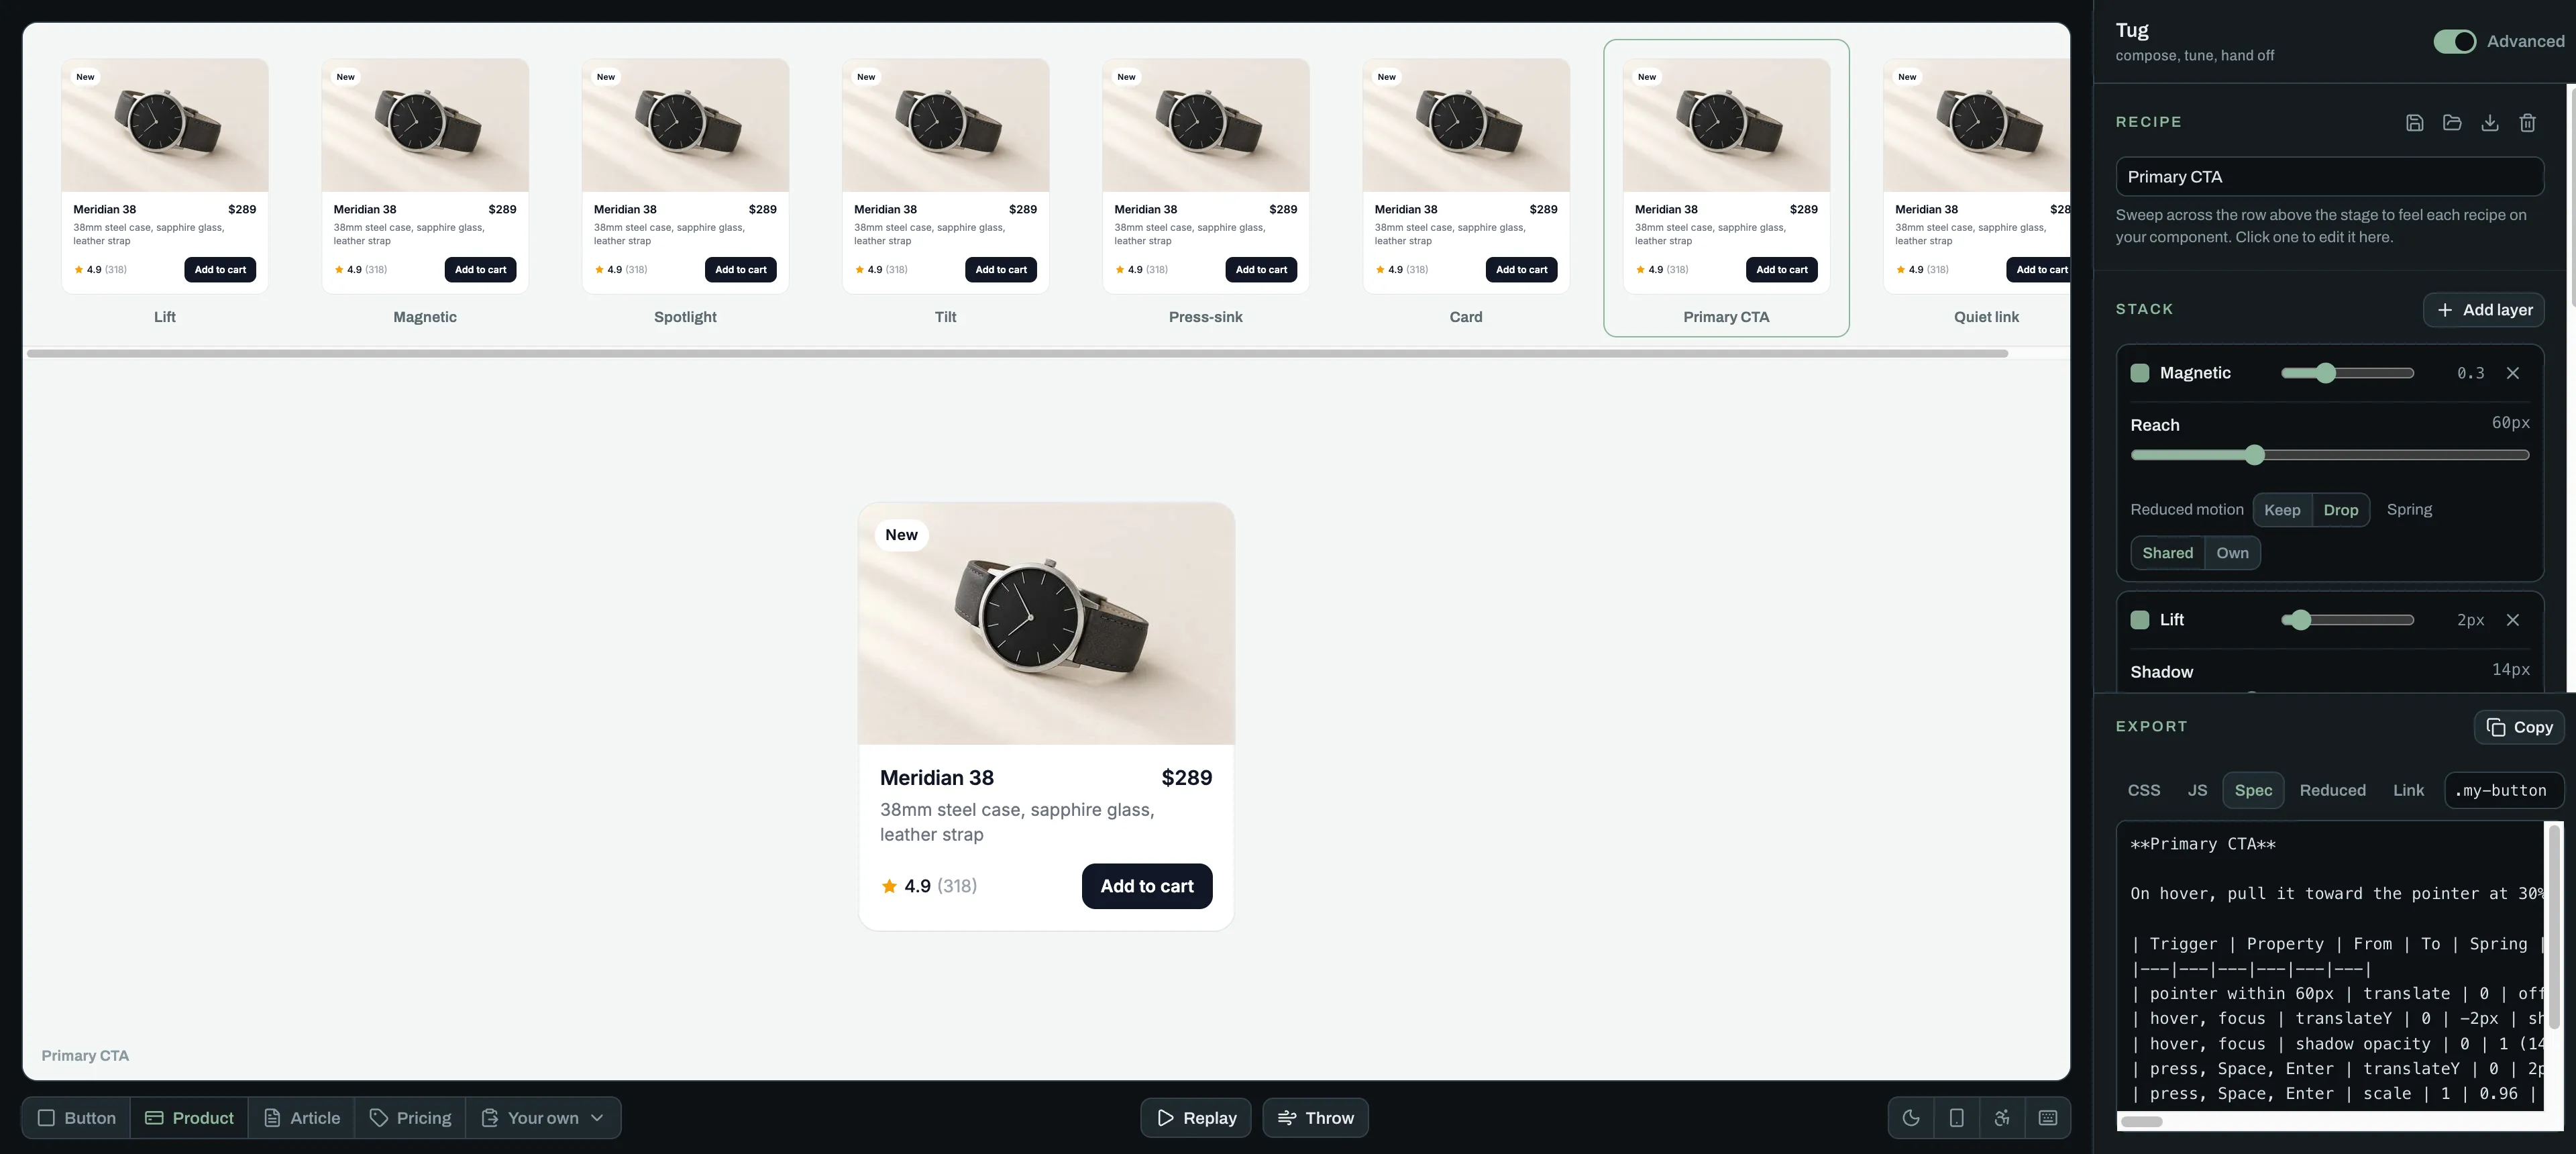
Start from Gentle, Quick, Bouncy, or Slow, the same names Figma uses. Flip on Advanced for stiffness, damping, mass, and the response curve. Replay plays the whole motion without the pointer; Throw flicks a magnetic element and lets it settle.
-
Check it honestly
Toggle the dark stage, touch, reduced motion, and keyboard focus to see exactly what each kind of visitor gets.
-
Hand it off
Copy the CSS and JS, the reduced-motion variant, or a spec sentence and table for a ticket or a Dev Mode note. The share link carries the whole recipe.
What it can do
- Your component, not ours
- Every recipe runs on what you pasted, inside a sandbox that strips scripts and outside requests.
- Layers that compose
- Transforms stack in a fixed order, so lift, magnetic, tilt, and press never fight over the same channel.
- Figma's spring dialect
- Stiffness, damping, and mass, with the same preset names, so values move between the file and the tool without translation.
- Code that matches the stage
- The runtime on the stage is the same function the JS export ships. A lift-only recipe exports as pure CSS with the spring sampled into a linear() easing.
- Reduced motion by policy
- Each layer is kept as a short cross-fade or dropped, and the export writes the media query for you.
- Cheap to run
- Only transform and opacity animate. Shadows and spotlights live on pseudo-elements that fade, so nothing repaints per frame.
How it works
-
One recipe drives everything
A recipe is a small JSON object: a spring and a list of layers. The stage plays it, the exporters compile it, the spec reads it aloud, and the share link encodes it. There is no second model to keep in sync.
-
Each channel is a spring
Every moving value, from the lift to each tilt axis, is its own damped spring stepped at 120 updates a second. Stiffness, damping, and mass are the physical constants, the same three Figma exposes, so the feel is a number you can pass along. Shown: Bouncy overshoots by 31% and settles in about 633ms; Gentle, in gray, never crosses the target.
-
The stage runs the export
Your pasted component renders in a sandboxed frame with no access to the page. Inside it, the function animating the specimen is the same function the JS tab hands you, so what you feel on the stage is what a developer gets.
-
CSS when CSS is enough
A recipe with no pointer-driven layers needs no script. The tool samples the spring's step response into a CSS linear() easing and exports hover, focus, active, and reduced-motion rules on the element itself. Shown: Quick, sampled 24 times into a 283ms transition.
Need a tool like this for your team?
Email me